Mastering Marble Procreate Brush Lettering for Stunning Digital Art
Digital lettering has evolved far beyond simple, flat vector lines. Today, creators are seeking depth, texture, and organic imperfections that mimic traditional media. This is where Marble Procreate Brush Lettering becomes an essential tool in your digital arsenal. By integrating a marble texture directly into the stroke of your brush, you eliminate the need for complex layer masking or post-production editing to achieve that luxurious, stone-like aesthetic. However, transitioning to textured digital brushes requires a shift in mindset and technique. Many artists stumble not because they lack talent, but because they misunderstand how these specialized tools interact with the Procreate engine.
Understanding the Mechanics of Textured Brushes
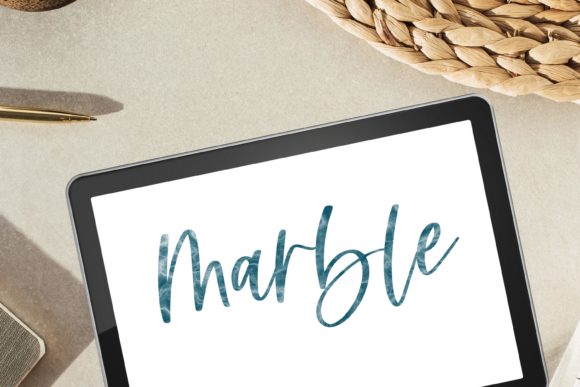
Before you begin swirling elegant loops, it is crucial to understand what a Procreate Calligraphy Brush with Marble Texture actually does. Unlike a standard round brush that applies a uniform color, a marble brush uses a grayscale map to determine opacity and density within the stroke. This creates the illusion of veins, cracks, and natural stone variations. The appeal is obvious: it adds instant sophistication to invitations, logos, and social media graphics. Yet, this convenience can lead to complacency. Relying solely on the brush’s built-in texture without considering underlying structure often results in lettering that looks messy rather than artistic.
The primary misunderstanding lies in assuming the texture will fix poor letterforms. If your foundational strokes are weak, the marble effect will only highlight those inconsistencies. The intricate details of the marble pattern can distract the eye from the flow of the word, making illegible handwriting look even more chaotic. Therefore, mastery of basic modern calligraphy shapes is a prerequisite, not an optional extra. You must be comfortable with pressure sensitivity and stroke direction before introducing complex textures.
Common Pitfalls When Using Marble Effects
One of the most frequent errors beginners make is ignoring canvas resolution. A Marble Procreate Brush relies on high-frequency detail to look realistic. If you are working on a small canvas, say 1000x1000 pixels, the marble texture will appear pixelated or muddy when scaled up for print or high-resolution screens. This oversight affects the final quality significantly, turning a premium-looking design into something amateurish. Always start with a canvas size that matches your final output intent, ideally at 300 DPI for any project intended for physical printing.
Another critical mistake is overusing the brush without adjusting opacity or flow. New users often keep settings at 100%, resulting in heavy, opaque strokes that lose the subtle translucency characteristic of real marble. Real stone has depth; light passes through it. By lowering the opacity slightly or using a lighter hand with your Apple Pencil, you allow the texture to breathe. This approach creates a more nuanced, elegant look that resembles polished stone rather than a solid block of patterned paint.
Furthermore, many creators fail to consider color contrast. Marble textures are inherently busy. Placing white marble lettering on a light gray background, for instance, destroys readability. The texture competes with the background noise. A better approach is to use high-contrast pairings, such as deep navy or black marble text on a crisp white background, or gold-accented marble on dark tones. This ensures that the textured lettering remains legible while still showcasing the artistic effect.
Technical Setup and Installation Errors
Since this product consists of digital files available via instant download, the installation process is a common friction point. It is vital to remember that no physical product will be shipped. You must download and open the files directly on your iPad into Procreate. A frequent error occurs when users attempt to install the brush set on a desktop computer or try to email the file to themselves without saving it correctly to the Files app. This leads to confusion and frustration, as the brush will not appear in the library if the import path is incorrect.
To avoid this, ensure you are using the latest version of Procreate. Older versions may not support the newer brush engine features that give the marble effect its smoothness. Additionally, verify that your iPad meets the system requirements for running Procreate efficiently. Lag or delay in stroke rendering can ruin the fluidity required for hand lettering, causing jagged lines that break the illusion of smooth stone. If you experience performance issues, close other apps and restart your device before beginning a serious project.
Optimizing Your Workflow for Better Results
To truly leverage the potential of Marble Procreate Brush Lettering, integrate it into a layered workflow. Do not letter directly on your final background. Instead, create your text on a separate layer. This allows you to experiment with blending modes. Try setting the layer to "Multiply" or "Overlay" to see how the marble texture interacts with underlying colors or images. This technique offers flexibility that static, flattened images cannot provide. You can adjust the position, scale, and rotation of the lettering without losing quality, provided you started with a sufficiently large canvas.
Consider combining the marble brush with solid color brushes for emphasis. For example, use the marble brush for the main word in a quote and a simple, clean script for the supporting text. This contrast prevents visual fatigue and guides the viewer’s eye to the most important element. It is a principle of digital illustration that variety creates interest. Using a textured brush for every single element can make a design feel overwhelming and disjointed.
What to Check Before You Begin
Before committing to a project, test the brush on a scratch pad. Check how the texture responds to different speeds of movement. Fast strokes may skip parts of the texture, while slow strokes might accumulate too much density. Understanding this behavior helps you maintain consistency throughout your piece. Also, evaluate the color palette you intend to use. Does the marble vein color complement your brand or project theme? If not, utilize Procreate’s hue and saturation adjustments to tweak the brush color non-destructively.
Remember, this tool is designed for modern lettering and painting brush applications. It is versatile enough for bold headers or delicate accents, but it requires intentional application. Avoid the temptation to rely on auto-correction features or quick fixes. The beauty of classic Procreate workflows lies in the manual control you exert over every stroke.
If you encounter difficulties during installation or usage, do not hesitate to reach out. Support is available to ensure you get the most out of your purchase. Whether you are a freelancer creating client deliverables, a blogger designing headers, or a hobbyist exploring smooth texture effects, proper technique makes all the difference. By avoiding these common pitfalls and focusing on foundational skills, you can elevate your digital art with the timeless elegance of marble.
Ultimately, the goal is to enhance your communication through visual appeal. Marble Procreate Brush Lettering is not just a filter; it is a sophisticated tool that demands respect and practice. Treat it as such, and it will become an indispensable part of your creative process, delivering professional, high-quality results that stand out in a crowded digital landscape.